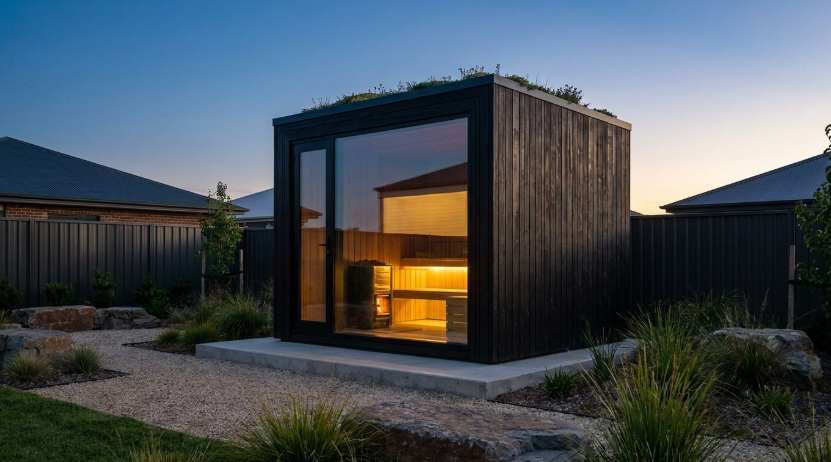
A cabin sauna needs a low intake vent near the heater and a higher or opposite-wall exhaust vent to keep air moving by convection, not a sealed box that only opens at the door. Get the vent placement wrong and the cabin either heats unevenly, with a cold layer pooling near the floor, or holds onto moisture between sessions long enough to warp the tongue-and-groove paneling within a couple of seasons. This guide compares the two common vent layouts and what each one trades off.
Why Does Vent Placement Matter More Than Vent Size?
People shopping for a cabin sauna often focus on cubic footage and heater kilowatts and treat ventilation as an afterthought, but the intake and exhaust placement affects both comfort and the wood’s lifespan more than most buyers expect. A cabin heats by convection: cold air enters low, passes over or near the heated stones, rises as it warms, and exits through the exhaust, pulling fresh air in behind it. Break that loop with vents in the wrong spots and the top of the cabin can run 15 to 20 degrees hotter than the lower bench even with a correctly sized heater.
Layout One: Low Intake Near the Heater, High Exhaust on the Opposite Wall
This is the most common setup in a traditional cabin sauna. The intake sits 20 to 40 inches off the floor, close enough to the heater that incoming cold air warms almost immediately instead of settling at ankle level. The exhaust sits near the ceiling on the far wall, pulling warm, humid air out at the top of the room. This layout favors fast air changes between sessions, which helps the cabin dry out, but it can let more heat escape during use since the exhaust is drawing from the hottest layer of air.
Layout Two: Low Intake, Mid-Height Exhaust Near the Upper Bench
An alternative places the exhaust lower, roughly at upper-bench height instead of the ceiling. This traps more heat and humidity in the occupied zone during a session, which some bathers prefer for a stronger löyly effect when water hits the stones, at the cost of a slower air exchange once the door closes and the session ends. Neither layout is objectively better; the choice comes down to whether the priority is a hotter, more humid session or faster drying between uses.
Does a Cabin Sauna Ever Need a Fan?
Most residential cabin saunas rely entirely on passive convection, using the pressure difference created by the heater rather than any powered air movement. Mechanical exhaust fans show up in commercial installs, health clubs, and some very large or unusually shaped cabins where passive gravity venting cannot pull enough air through the space. For a typical backyard or basement cabin sized for two to six people, a fan is not standard equipment and adding one is rarely necessary if the intake and exhaust are sized and placed correctly.
What Happens When Ventilation Is Wrong?
A cabin with blocked, undersized, or badly placed vents shows the damage slowly rather than all at once. Moisture from steam and body heat gets trapped in the wall cavity behind the kiln-dried paneling instead of drying out between sessions, and over a season or two that trapped moisture promotes mold growth on the inside of the boards and speeds up warping at the tongue-and-groove joints. A cabin that smells musty rather than like cedar or spruce after a few months of regular use is often a ventilation problem, not a wood-quality problem, and it is worth checking vent clearance before assuming the panels themselves were defective.
Checking Vent Clearance and Sizing Before You Install
Manufacturer instructions typically specify a minimum vent opening, often in the range of a few square inches per vent, scaled to the cabin’s interior volume. Furniture, towel hooks, or a bench placed too close to a vent can choke airflow even when the vent itself is the correct size, so it is worth doing a final walkthrough after the interior is fully set up, not just after the shell is built. Buyers comparing prebuilt cabins with vents already engineered into the panel layout, including options from compare models here, generally have an easier time than retrofitting vents into a kit designed without them, since cutting new openings into finished tongue-and-groove walls after the fact risks compromising the seal around the stove clearance zone.
Does Airflow Affect the Health Case for Sauna Use?
Good ventilation is mostly about comfort and equipment longevity, but it also supports the consistency that the research on sauna use depends on. A 2018 systematic review in Evidence-Based Complementary and Alternative Medicine found associations between regular sauna sessions and improvements in several cardiovascular and respiratory markers, and a 2023 Mayo Clinic Proceedings review noted that sauna bathing combined with other healthy lifestyle factors was associated with added benefit. These findings are about consistent, comfortable use over time, and a cabin with uneven heat or lingering staleness is less likely to get used four times a week than one that heats predictably and smells clean.
How to Test Airflow Before You Finalize a Design
Once a cabin is assembled but before the interior finishing goes in, it is worth doing a simple smoke test to confirm the intake and exhaust are actually pulling air the way the layout intends. A lit incense stick or a wisp of smoke held near the intake vent should visibly draw inward, and the same test at the exhaust should show it moving outward, not just sitting still or drifting back into the room. If the smoke barely moves at either vent, the opening is likely undersized for the cabin’s volume or the heater has not built up enough of a pressure differential yet, which is normal in the first few minutes of a cold start but should resolve once the stones reach temperature. Testing before the interior paneling and bench trim go in makes it far easier to adjust vent size or reposition an opening than trying to fix airflow after the cabin is fully finished.
Seasonal Adjustments Worth Making
Ventilation needs are not identical year round. In colder months, some owners partially restrict the exhaust to hold heat and humidity longer during a session, then open it fully afterward to speed drying before the next use. In humid summer climates, leaving both vents more open between sessions, not just during them, helps counteract ambient outdoor humidity that slows the cabin’s natural drying cycle. Neither adjustment requires new hardware, just being deliberate about vent position rather than leaving it fixed in one setting year round regardless of outside conditions.
Frequently Asked Questions
Where should the fresh-air intake go in a cabin sauna? Low on the wall near the heater, roughly 20 to 40 inches up, so cold air warms quickly instead of pooling at floor level.
Where should the exhaust vent go? Usually on the opposite wall, either near the ceiling for fast air changes or lower, near bench height, for a hotter, more humid session.
Does a cabin sauna need mechanical ventilation? Most residential units run on passive convection alone; fans are mainly used in commercial or oversized installs.
Why does poor ventilation shorten a cabin sauna’s life? Trapped moisture behind the paneling promotes mold and speeds up warping at the board joints over a season or two.
Should the vents stay open during a session? Yes, closing both can starve the heater of air and let humidity build up faster than the wood can handle between uses.
References
- Clinical Effects of Regular Dry Sauna Bathing: A Systematic Review, Evidence-Based Complementary and Alternative Medicine, 2018
- Does the Combination of Finnish Sauna Bathing and Other Lifestyle Factors Confer Additional Health Benefits? A Review of the Evidence, Mayo Clinic Proceedings, 2023
- Cardiovascular and Other Health Benefits of Sauna Bathing: A Review of the Evidence, Mayo Clinic Proceedings, 2018
By Colin Whitfield